Can You Paint Over Wallpaper? 7 Proven Steps for a Perfect Finish
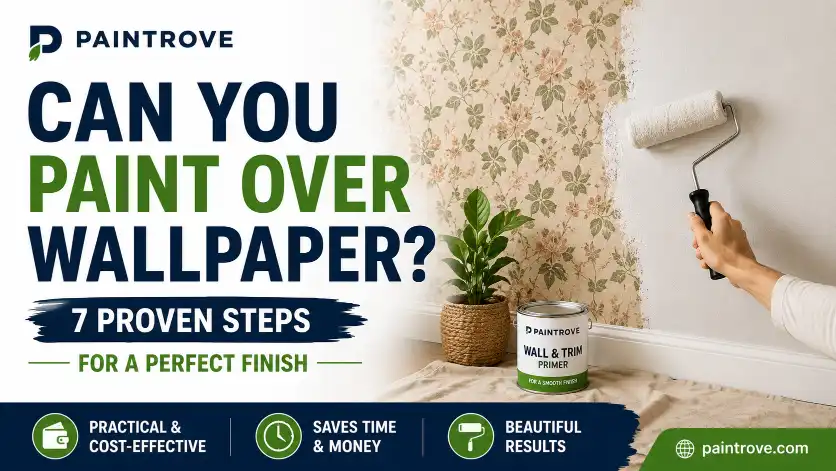
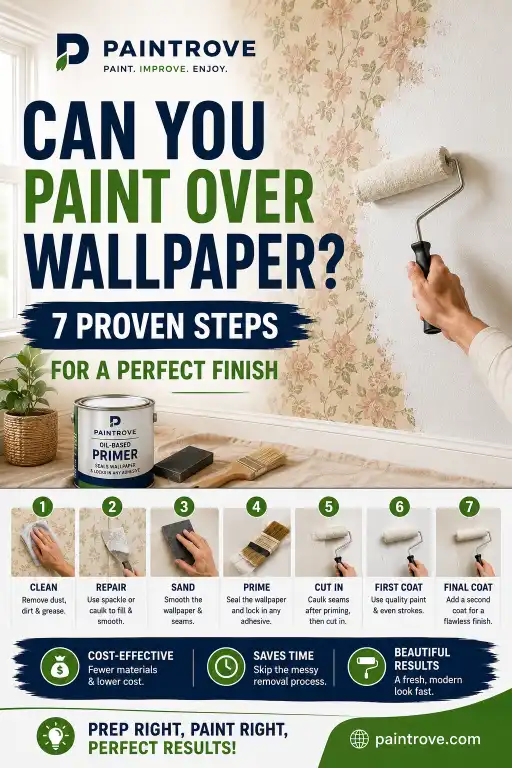
Can You Paint Over Wallpaper? Yes, you can paint over wallpaper, but only if the wallpaper is well-adhered, smooth, and properly sealed with an oil-based primer before painting. Painting over wallpaper works as a practical, cost-effective alternative to removal when the surface is in good condition.
Get it wrong, however, and you’ll face bubbling seams, peeling paint, and a wall that looks worse than the ’80s floral you were trying to cover. This step-by-step guide covers everything you need to make the right call: the pros, the cons, the deal-breakers, and exactly how to prep wallpaper for paint so it sticks and stays.
Can You Paint Over Wallpaper Without Removing It?
You can paint over wallpaper without removing it, provided three conditions are met: the wallpaper lies completely flat against the wall with no bubbling or loose seams, the surface is smooth enough to accept paint, and you seal it with an oil-based primer before applying any water-based topcoat.
The reason oil-based primer is non-negotiable is chemistry. Most wallpaper adhesives are water-based. Apply latex paint or a water-based primer directly over wallpaper and the moisture reactivates the old paste — causing the paper to curl, lift at the seams, and delaminate. An oil-based primer seals the wallpaper completely, locks in any residual adhesive, and gives your topcoat a stable surface to bond to.
The quick test: Press every seam and corner firmly with your fingertip. If anything lifts, moves, or sounds hollow, you are not a good candidate for painting over — remove it first.
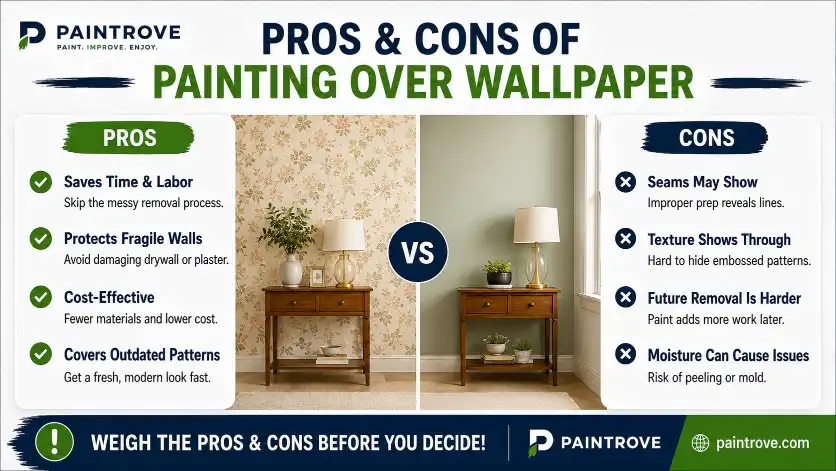
Pros and Cons of Painting Over Wallpaper
Before committing to this route, weigh the full picture.
Pros
Saves significant time. Stripping wallpaper is one of the most labor-intensive DIY jobs in a home. It requires steamers, scrapers, chemical strippers, and extensive wall repair afterward. Painting over sound wallpaper can cut your total project time by half or more.
Protects fragile walls. In older homes — and especially in mobile homes — the drywall or plaster behind wallpaper is often fragile. Attempting wallpaper removal can tear the drywall paper face, creating a repair problem far worse than the wallpaper itself. Painting over it sidesteps this risk entirely.
Lower cost. Fewer materials, less labor, no need for professional removal. If the wallpaper is in good condition, painting over it can save both time and money — particularly practical for rental properties or commercial spaces that need a quick, affordable update.
Covers outdated patterns. A flat or eggshell topcoat over properly primed wallpaper creates a modern, cohesive look that completely masks old floral prints, bold geometric patterns, or dated designs.
Cons
Seams always show — without the right prep. Wallpaper comes in panels, so there are always seams. Without caulking and sanding every seam before painting, those lines telegraph right through your topcoat, especially in raking light.
Texture telegraphs through paint. Painting over textured wallpaper is especially tricky — it is nearly impossible to hide the underlying pattern once it is painted. The texture will show through every coat you apply.
Dark or bold wallpaper bleeds. Painting over dark wallpaper without a gray-tinted primer runs the risk of the underlying color or pattern gradually re-emerging over time, particularly as paint wears.
It complicates future removal. Once you paint over wallpaper, future removal becomes significantly more difficult. The paint removes any porosity from the paper surface and stiffens it by adding thickness. Every additional coat of paint makes the eventual removal job harder and more tedious.
Moisture risk. If the wallpaper was ever exposed to moisture — even once — mold may be growing behind it unseen. Painting over it traps that moisture and creates a long-term problem.
When You Shouldn’t Paint Over Wallpaper (Deal-Breakers)
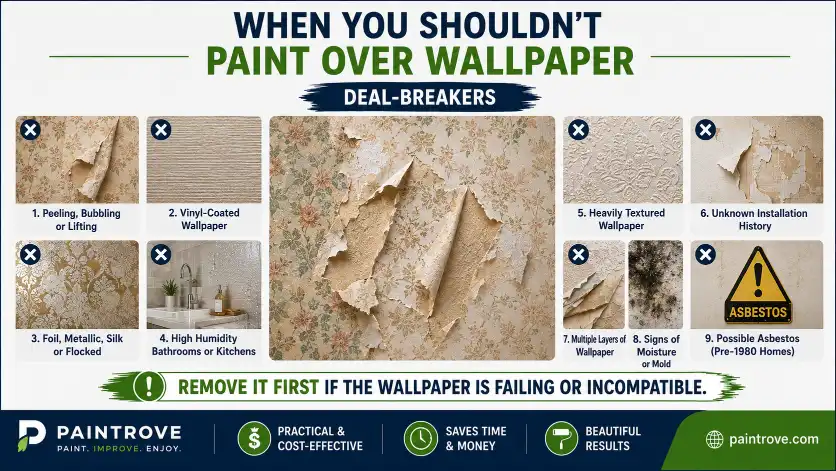
Some situations make painting over wallpaper a bad idea regardless of technique. Skip primer, skip prep, or skip this checklist — and you will regret it.
Do not paint over wallpaper if:
- Any section is peeling, bubbling, torn, or lifting at the seams
- The wallpaper is vinyl-coated — vinyl resists moisture, which means primer and paint adhesion are compromised
- The wallpaper is foil, metallic, silk, or flocked — these surfaces are incompatible with paint
- The wallpaper is heavily textured — no amount of paint or primer will hide a deeply embossed texture
- The room is a bathroom or kitchen with ongoing high humidity — fluctuating moisture levels cause paint to peel from wallpaper even when installed correctly
- You don’t know the installation history — unknown-age wallpaper may have failing adhesive that paint weight will accelerate
- There are multiple layers of wallpaper already on the wall — paint adds more weight and hastens delamination
- You suspect the wallpaper or home may contain asbestos (common in homes built before 1980) — check for asbestos before disturbing any wall surface
What Tools and Materials Do You Need?
Gather everything before you start. Stopping mid-project to make a run to the home improvement store is how mistakes happen.
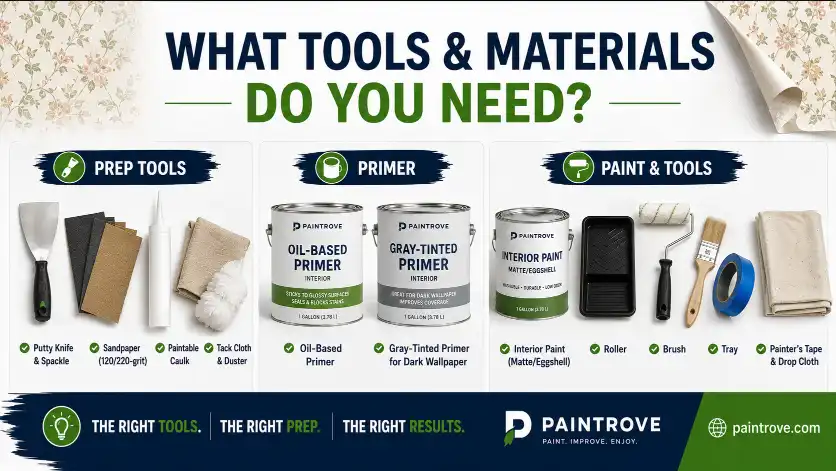
Prep Materials:
- Putty knife and spackle for repairing tears and damaged sections
- Sander or sanding sponge (120-grit for seams, 220-grit for final smoothing)
- Paintable caulk or joint compound for seam repair
- Tack cloth to remove sanding dust before priming
- Duster or microfiber cloth for general wall cleaning
Primer:
- Oil-based primer — Zinsser BIN Shellac-Based Primer or Zinsser Bulls Eye 1-2-3 are the industry standards for painting over wallpaper
- For dark or bold wallpaper, use a gray-tinted primer to prevent bleed-through
Paint and Application:
- Benjamin Moore, Sherwin-Williams, or Behr interior paint in matte or eggshell finish (avoid satin or gloss — higher sheen exposes every imperfection)
- High-quality paint brush (2.5-inch angled sash) for cutting in
- Paint roller and paint roller cover (3/8-inch nap for smooth surfaces)
- Painter’s tape (Frog Tape recommended for clean lines at baseboards and crown molding)
- Canvas drop cloths
- Paint tray and paint tray liner
- Extension pole
Optional:
- Paintable wallpaper (if you want to install new textured wallpaper and paint it — a legitimate design approach)
- Skim coat / joint compound for smoothing textured wallpaper before painting
How to Prep Wallpaper for Paint: 6-Step Checklist
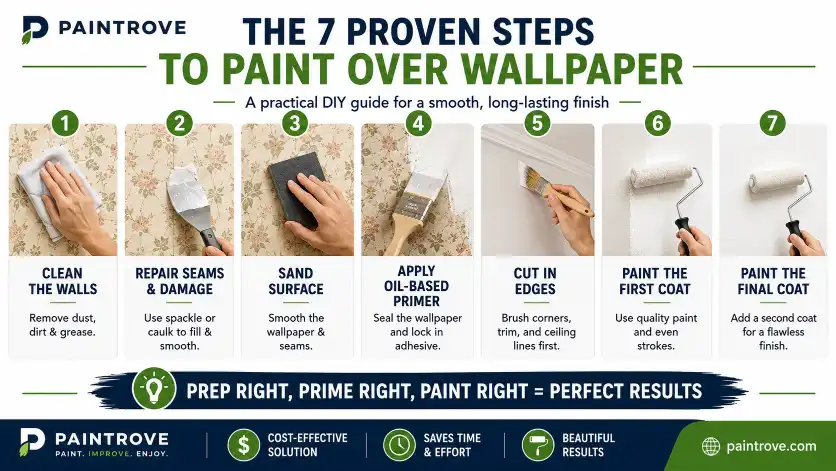
Prep is where this project is won or lost. Rushing the prep is how you end up with bubbling seams and a finish that looks worse than the original wallpaper.
Step 1 — Inspect and re-adhere loose sections. Go over every inch of the wall and press down any lifting edges or bubbling sections. Use a seam repair adhesive or wallpaper paste to re-glue any loose areas. Let the adhesive dry fully before proceeding — at least 24 hours.
Step 2 — Repair tears and damaged sections. Apply spackle to any torn areas using a putty knife, pressing the paper flat and building up any low spots. Let dry completely, then sand smooth with 120-grit sandpaper. Blend the repair into the surrounding surface.
Step 3 — Fill and sand all seams. Apply paintable caulk or joint compound to every seam line. Smooth it with a putty knife and feather it out 2–3 inches on either side so there is no hard edge. Let dry fully, then sand with 120-grit. This seam bubbling prevention step is what separates a professional-looking result from an amateur one.
Step 4 — Clean the entire wall surface. Wipe down the entire wall with a lightly damp cloth to remove dust, sanding particles, and any surface contamination. Follow with a tack cloth to pick up the finest particles. Paint does not adhere well to dusty surfaces.
Step 5 — Apply painter’s tape. Run Frog Tape along all baseboards, window frames, and ceiling lines. Press every inch firmly with your fingertip or a credit card to prevent bleed at the edges.
Step 6 — Lay canvas drop cloths. Cover the entire floor with canvas drop cloths. Remove outlet covers and light switch plates and store the hardware in Ziploc bags.
How to Prime Like a Pro Before Painting Over Wallpaper
Priming is the single most critical technical step in this project. Use the wrong primer and the moisture in water-based paint will reactivate the wallpaper paste — causing everything to bubble and delaminate.
Primer Types at a Glance
| Primer Type | Best For | Notes |
|---|---|---|
| Oil-based primer (Zinsser BIN, KILZ Original) | All wallpaper painting projects | The gold standard — seals adhesive, prevents bleed-through |
| Shellac-based primer | Stain-blocking, odor sealing | Fast-drying, excellent adhesion on difficult surfaces |
| Water-based primer | Not recommended over wallpaper | Reactivates wallpaper paste — causes bubbling |
| Gray-tinted oil primer | Dark or saturated wallpaper | Prevents pattern bleed-through into topcoat |
Application Tips
Apply the oil-based primer using the same cut-in-then-roll technique used for paint: cut in the ceiling line, corners, and baseboard edges with an angled brush first, then roll the field of the wall. Work in 4-foot sections and maintain a wet edge.
Allow the primer to dry fully before painting — oil-based primers typically require 8 to 24 hours of dry time. Do not rush this. Sanding lightly with 220-grit sandpaper between primer and topcoat gives the paint an even better surface to grip.
How to Paint Over Wallpaper Step by Step
Once your primer is dry and your prep is complete, painting over wallpaper follows the same technique as painting any interior wall — with a few important nuances.
Step 1 — Choose the Right Color and Finish
Choose a matte or eggshell finish for your topcoat. Avoid satin, semi-gloss, or gloss finishes — higher sheen levels catch light and highlight every imperfection in the wallpaper surface beneath. Lighter or neutral paint colors are more forgiving; darker shades require additional coats and meticulous prep.
When painting over wallpaper that has already been painted before, inspect the existing surface carefully. Any previous coats that are flaking or poorly bonded must be addressed before adding more paint.
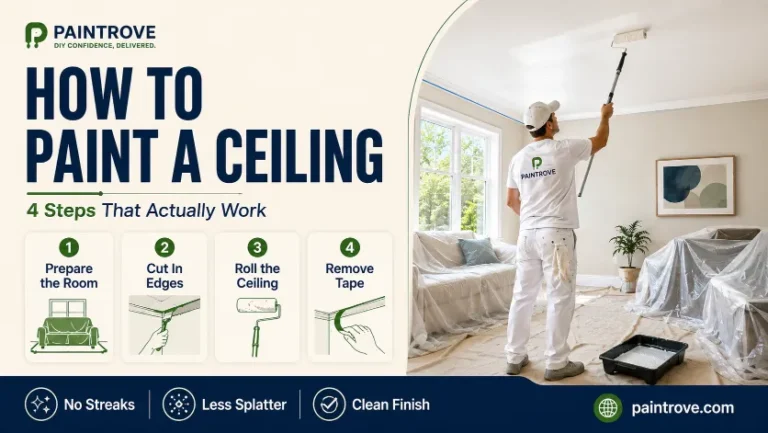
Step 2 — Cut In First
Load a high-quality 2.5-inch angled paint brush and cut in a 2- to 3-inch band along the ceiling line, corners, and baseboard edges. Do one wall at a time — cut in, then roll immediately while the cut-in edges are still wet. This wet-edge technique blends the cut-in brush marks invisibly into the rolled surface.
Step 3 — Roll Two Coats
Fill your paint tray liner halfway. Load the paint roller evenly across the ribbed surface of the tray. Apply paint using a W or M stroke across the wall, then smooth with parallel vertical strokes from top to bottom without reloading. This distributes paint evenly and eliminates roller texture lines.
Apply two coats minimum. Two thin coats always outperform one heavy coat — they cure harder, look smoother, and are less likely to sag or show drips. Allow 1–2 hours of dry time between coats for latex paint. If painting over dark or heavily patterned wallpaper, a third coat may be necessary for full opacity.
Step 4 — Remove Tape and Touch Up
Pull painter’s tape while the final coat is still slightly tacky — not fully dry. Pull at a 45-degree angle in one slow, steady motion. Touch up any thin spots or bleed areas with a small angled brush. Latex paint is dry to the touch in 1–2 hours and reaches full hardness in 30 days.
Can You Paint Over Wallpaper Glue?
Yes, you can paint over wallpaper glue residue — but preparation is essential. If you have removed wallpaper and are left with sticky, rough adhesive residue on the walls, follow these steps before painting:
- Remove as much glue as possible by scrubbing the walls with warm water and a sponge. Most wallpaper pastes are water-based and will dissolve with water.
- Sand stubborn residue using a 120-grit sanding screen. A random orbital sander connected to a shop vac speeds this up considerably. Note that dried glue will clog sandpaper quickly.
- Skim coat if needed. If glue residue is heavy, apply a thin skim coat of lightweight drywall compound over the wall, sand smooth once dry, and prime.
- Apply oil-based primer. This is the same rule as painting over wallpaper itself — oil-based primer will not reactivate water-based wallpaper paste. A water-based primer applied over residual glue will cause the same bubbling and adhesion failures.
If removing all the glue residue is impractical, you can apply a heavy-bodied surface sealer (like Gardz by Zinsser) over the remaining adhesive, then apply a textured paint to mask the uneven surface. This is not a perfect result but is a viable option for low-visibility rooms.

Can You Paint Over Wallpaper Paste?
Can you paint over wallpaper paste still on the wall? Only with an oil-based primer first. The key risk is the same as painting over wallpaper: water-based primers and latex paint will reactivate wallpaper paste, causing it to soften and the surface to bubble. Seal it with oil-based primer and the paste becomes inert beneath the paint film.
Can You Paint Over Wallpaper Border?
Yes — wallpaper borders can be painted over using the same method as full wallpaper. The challenge is the step created where the border meets the wall surface. Fill that height difference with joint compound, sand smooth, prime with oil-based primer, and paint. Without addressing the step, the border outline will telegraph through your topcoat as a raised ridge.
Can You Paint Over Wallpaper in a Bathroom?
Painting over wallpaper in a bathroom is possible but comes with significant caveats. Bathrooms experience high and fluctuating humidity levels that cause paint to peel from wallpaper even when properly primed. If you choose to proceed:
- Use a moisture-resistant paint (look for mold and mildew resistant formulas from Benjamin Moore or Sherwin-Williams)
- Ensure the bathroom has proper ventilation — a working exhaust fan that clears humidity within 15 minutes of showering
- Use oil-based primer without exception
- Inspect the wallpaper very carefully for any signs of moisture damage behind it before painting over
In most cases, a bathroom is one of the situations where full wallpaper removal is the better long-term decision.
Paint vs. Wallpaper Removal: Cost and Time
| Factor | Paint Over Wallpaper | Full Wallpaper Removal |
|---|---|---|
| Time | 1–2 days | 2–5 days |
| DIY cost | $100–$200 | $50–$150 (tools + chemicals) |
| Professional cost | $300–$800 | $500–$2,000+ |
| Long-term result | Good (temporary solution) | Best (permanent solution) |
| Future removal difficulty | Much harder | N/A |
| Risk level | Moderate | Low (done correctly) |
Painting over wallpaper makes strong financial sense as a temporary or interim solution — before selling a home, refreshing a rental, or buying time before a full renovation. For a permanent result you will live with for 10+ years, wallpaper removal and a proper paint job on bare walls is always the better investment.
Environmental and Health Considerations
A low-VOC oil-based primer is worth seeking out if you have asthma, chemical sensitivities, or are working in a poorly ventilated space. Traditional oil-based primers contain high VOC levels — open every window, run fans, and wear a respirator rated for organic vapors. Allow full off-gassing before sleeping in the room.
Always check for asbestos before working on walls in homes built before 1980. This is especially relevant in mobile homes from that era. A professional asbestos test costs $25–$75 and takes 24–48 hours — always worth doing before disturbing old wall surfaces.
Common Mistakes to Dodge When Painting Over Wallpaper
- Using latex or water-based primer. This is the single most common and catastrophic mistake. It reactivates the adhesive and destroys the project. Always use oil-based primer.
- Skipping seam repair. Every seam will show through paint. Fill, sand, and feather every one before priming.
- Painting over peeling or bubbling sections. Paint weight accelerates existing adhesion failures. Re-adhere loose sections first or remove the wallpaper entirely.
- Using a high-sheen topcoat. Satin and gloss finishes amplify every texture and imperfection. Use matte or eggshell.
- Not testing a small patch first. Before committing to the entire room, paint a 1-foot test patch in an inconspicuous corner. Let it dry for 24 hours and check for bubbling, peeling, or pattern bleed-through.
- Rushing the primer dry time. Oil-based primer can take up to 24 hours to cure fully. Painting over it before it is ready compromises adhesion.
- Applying too few coats. One coat of paint over wallpaper is almost never enough. Two coats minimum; three for dark or patterned wallpaper.
FAQs
Can you paint over patterned wallpaper?
Yes, but bold or dark patterns require a gray-tinted oil-based primer to prevent bleed-through. Light or neutral patterns covered with two coats of matte paint typically disappear entirely.
Can you paint over wallpaper that has already been painted?
Yes — inspect the existing painted surface first. If the previous paint is sound, clean the surface, apply a fresh coat of oil-based primer, and repaint. If previous paint is flaking or peeling, address those areas before adding more paint.
What kind of paint do you use to paint over wallpaper?
Use a matte or eggshell latex paint for the topcoat. The primer must be oil-based, but the topcoat can be water-based latex. Avoid satin, semi-gloss, or gloss finishes — they expose every imperfection.
Can you paint over wallpaper with a roller?
Yes — use a standard 3/8-inch nap paint roller for smooth wallpaper. Cut in the edges first with an angled brush, then roll the field. Avoid pressing the roller too hard at seam areas, as pressure can lift edges that are not perfectly adhered.
Can you paint over wallpaper without sanding?
You can skip sanding the entire wall surface, but you must sand repaired seams and spackled areas smooth before priming. Painting over unsanded repairs will produce visible bumps under the topcoat.
Can you paint over wallpaper with emulsion?
Emulsion paint is water-based, which means applying it directly over wallpaper will reactivate the adhesive paste. You must apply an oil-based primer first — then you can use emulsion as your topcoat.
How many times can you paint over wallpaper?
There is no fixed limit, but every additional coat of paint makes the wallpaper harder to remove in the future, adds weight to the wall surface, and increases the risk of adhesion failure. Most professionals recommend no more than two or three paint applications over wallpaper before removal becomes the only viable path forward.
Can you paint over wallpaper backing?
Wallpaper backing — the paper layer left behind after the facing has been removed — can be painted over if it is fully adhered, but it is fragile. Wet it slightly and it may tear or lift. The safest approach is to apply Gardz penetrating sealer over the backing, let it dry, sand lightly, then prime with oil-based primer before painting.
The Bottom Line
Painting over wallpaper is absolutely possible — and done correctly, it can produce a clean, fresh result without the mess and cost of full removal. The non-negotiables are: sound, fully adhered wallpaper, thorough seam repair and sanding, and oil-based primer before any water-based topcoat. Skip any of those three and you will face bubbling, peeling, or a finish that highlights the very wallpaper you were trying to hide.
When you shouldn’t paint over wallpaper: vinyl, foil, metallic, heavily textured, or moisture-damaged wallpaper should always be removed before painting. Bathrooms and kitchens with ongoing moisture exposure are also situations where removal is the right long-term call.
For everything else — the dated floral in the dining room, the fragile mobile home walls, the rental that needs freshening before the next tenant — painting over wallpaper with the right prep is a smart shortcut to gorgeous walls.