How to paint a Room – 7 Steps From My Own Experience

Knowing how to paint a room correctly is the difference between a result that looks professional and one that needs to be redone. Painting a room takes 4 to 8 hours for a DIYer and costs between $300 and $800 when hiring a professional for a standard bedroom.
To paint a room yourself, you need to prepare your space, repair nail holes, prime your walls, cut in the edges with a high-quality paint brush, and roll the interior walls in two thin coats — working from ceiling to trim to walls. Done correctly, a fresh coat of paint can completely transform a room in a single weekend.
What Supplies Do You Need to Paint a Room?
The right tools make the difference between an amateur finish and a paint job that looks like a pro did it. Before you visit your local Benjamin Moore paint stores or home improvement store, build your complete supply list.
Paint and Prep Products:
- Benjamin Moore interior paint (1 gallon covers 300–400 sq ft)
- Stain-blocking primer or all-purpose primer
- Spackle for filling nail holes and anchor holes
- Putty knife for applying and smoothing spackle
Taping and Protection:
- Frog Tape (the green painter’s tape with PaintBlock technology for clean lines)
- Painter’s tape for baseboards, window frames, and crown molding
- Canvas drop cloths to protect floors — never plastic, which is slippery and doesn’t absorb drips
- Plastic inserts for paint trays
Application Tools:
- High-quality paint brush — 2.5-inch angled sash brush for cutting in
- Paint roller and paint roller cover (3/8-inch nap for smooth walls, 1/2-inch for textured walls)
- Extension pole for reaching ceilings without a ladder on every pass
- Ladder for high corners and crown molding work
- Hand held paint bucket for cutting in without lugging a full gallon
Cleanup and Extras:
- Miracle Wipes or damp rags for drips and cleanup
- Duster or microfiber cloth for wiping walls before painting
- Paint can opener and stir sticks
- Ziploc bags for storing wet brushes between coats
- Sander (120-grit) for smoothing spackled spots and scuff-sanding glossy surfaces
- Paint tray and paint tray liner (liners save cleanup time)
Optional but Helpful:
- Paint sprayer for large open spaces or board and batten / wood wall treatment projects
- Credit card or old loyalty card to press tape edges firmly against trim
Pro Tip from LaTanya: Queue up your favorite audiobook, podcast, or paint playlist before you start. Painting is one of those satisfying DIY tasks that’s much more enjoyable with good audio — and it keeps you from rushing.

How Do You Prepare Your Space for Painting?
Preparing your space is the most important step in the entire painting process. Skipping prep is the number-one reason DIY paint jobs look uneven, blotchy, or unprofessional.
Follow these 5 steps to prepare your space for painting:
1. Clear and protect the room. Remove as much furniture as possible. Push heavier pieces to the center of the room and cover them completely with canvas drop cloths. Remove outlet covers, light switch plates, and unscrew any screws from the wall. Store the hardware in Ziploc bags so nothing gets lost.
2. Repair nail holes, anchor holes, and drywall damage. Use a putty knife to press spackle into every nail hole, anchor hole, and crack. Smooth it level with the wall surface and let it dry completely — typically 1 to 2 hours for standard spackle, up to 24 hours for deeper repairs. Once dry, sand each patch smooth with a 120-grit sander or sanding sponge. This step is non-negotiable: spackle patches that aren’t sanded will be visible under paint.
3. Clean the walls. Use a duster to knock down cobwebs, then wipe the entire wall surface with a damp cloth or Miracle Wipes. Greasy walls — especially in kitchens — should be wiped with a degreaser. Paint does not adhere well to dusty or oily surfaces.
4. Apply painter’s tape. Run Frog Tape along all baseboards, window frames, crown molding, and ceiling edges. Press the tape edge firmly using your fingertip or a credit card to prevent paint bleed. For the sharpest clean lines, apply the tape right before painting — not the night before.
5. Lay drop cloths and remove outlet covers. Spread canvas drop cloths across the entire floor, overlapping edges by at least 6 inches. Canvas stays in place and absorbs splatter; plastic tarps slide and let paint pool underneath. Remove all outlet covers and light switch plates — painting around them always looks sloppy.
Should You Prime Your Walls Before Painting?
Yes, in most cases you should prime your walls before applying color. Prime your walls whenever you are painting new, bare drywall, covering a dark or saturated color, blocking water stains or smoke damage, or painting over bare wood such as board and batten or a wood wall treatment.
Use a stain-blocking primer (like Zinsser BIN or KILZ Original) for stain and odor situations. For standard repaints over similar colors, a high-hiding all-purpose primer is sufficient. Benjamin Moore’s Fresh Start High-Hiding All Purpose Primer is a top performer for interior walls.
Apply primer with the same technique as paint: cut in the edges with a paint brush first, then roll the field of the wall. Allow primer to dry fully — typically 1 hour for latex primer — before sanding lightly with 220-grit sandpaper and applying your topcoat.
When can you skip primer? If you are repainting a wall the same color or a slightly lighter shade with a high-quality paint like Benjamin Moore Aura or Regal Select, primer is often unnecessary. These paints have excellent hide and self-priming properties built in.
What Is the Correct Order to Paint a Room?
The correct order to paint a room is: ceiling first, then trim (baseboards, crown molding, and window frames), then walls last. This sequence lets you work from top to bottom, catching any drips or splatter on surfaces you haven’t painted yet.
Here is the exact sequence:
- Prep the room (clear, repair, clean, tape)
- Apply primer where needed
- Paint the ceiling
- Paint the trim — baseboards, crown molding, window frames, and door frames
- Paint the walls (cut in edges, then roll)
- Apply a second coat after 1–2 hours of drying time
- Remove painter’s tape while the final coat is still slightly wet
How to Paint a Room Step by Step?
Step 1 — Paint the Ceiling First
Use a flat ceiling paint — its matte finish minimizes light reflection and hides roller marks. Cut in a 2- to 3-inch band around the entire ceiling perimeter with an angled paint brush, then roll the field of the ceiling while your cut-in edges are still wet. Wet edges blend seamlessly; dry edges create visible lap marks.
Use an extension pole to roll the ceiling comfortably without a ladder. Work in 4-foot sections using overlapping W-shaped strokes, then smooth with long parallel passes.
Step 2 — Paint Trim, Baseboards, and Crown Molding
Allow the ceiling to dry for at least 1 hour before painting trim. Use a 2-inch angled paint brush and a semi-gloss or gloss finish for all trim — the higher sheen is more durable and easier to wipe clean. Semi-gloss creates a subtle gloss level contrast against matte or eggshell walls that looks polished and intentional.
Work carefully along baseboards. If you have steady hands, tape is optional here; many experienced painters prefer to cut freehand. If you use tape, press every inch firmly with a credit card before painting.
Step 3 — Cut In the Walls
Cutting in means painting a 2- to 3-inch band of color around the entire perimeter of each wall — along the ceiling line, down the corners, and along the top edge of the baseboards. This is the technique that creates clean lines without relying entirely on tape.
Load your angled paint brush about one-third of the way up the bristles and tap off the excess inside the can. Start an inch away from the edge, then guide the tip of the brush toward the line in one smooth motion. Cut in line control is the single skill that most separates amateur from professional results. Cut in one full wall before rolling it — do not cut in the entire room before rolling. This keeps the edges wet for blending.
Store your loaded brush between walls by sliding it into a Ziploc bag or wrapping it in plastic wrap. This prevents the bristles from drying out and eliminates the need to wash mid-project.
Step 4 — Roll the Walls in Thin Coats
Fill your paint tray liner about halfway. Load the paint roller evenly by rolling it into the deep end of the tray and back across the ridged surface to distribute paint. An over-loaded roller causes drips; an under-loaded roller leaves dry streaks.
Apply the first coat using a W or M stroke, starting from the baseboard and rolling up toward the ceiling. Work in 3- to 4-foot vertical sections. After each loaded pass, smooth the section with light vertical strokes from top to bottom without reloading. This “laying off” technique gives an even finish without roller texture lines.
Always maintain a wet edge — roll the next section while the edge of the previous section is still wet. Lapping over dry paint creates visible ridges. Two thin coats always look better than one thick coat. Apply the second coat after 1–2 hours of dry time for latex paint.
Step 5 — Remove Tape and Touch Up
Remove painter’s tape while the final coat of paint is still slightly tacky — not fully dry. Pull the tape back at a 45-degree angle slowly and steadily. This edge feathering method is what creates the sharp, clean lines you see on professional paint jobs. If you wait until the paint is fully hard, the tape can peel away chunks of the finish.
Use a small angled paint brush to touch up any bleed spots or thin areas. Latex paint is dry to the touch in 1–2 hours, ready for a second coat in 1–2 hours, and reaches full hardness (full cure) in 30 days.

How Long Does It Take to Paint a Room?
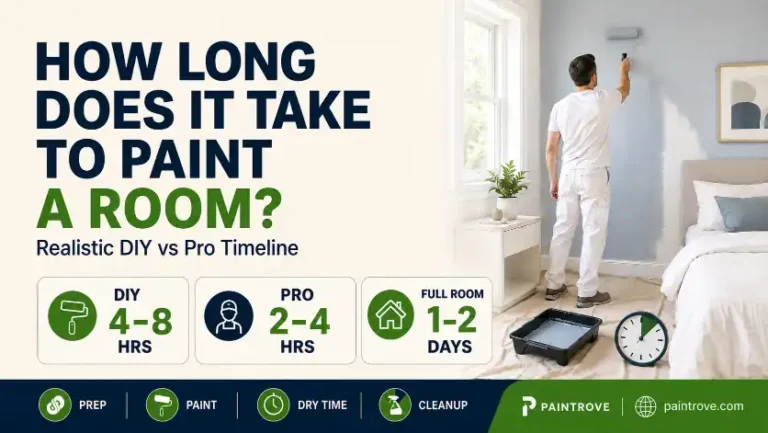
Painting a room takes 4 to 8 hours for a DIYer, not counting drying time between coats. A professional painter can complete the same room in 2 to 4 hours. Most DIY bedroom projects realistically span two days — one for prep and priming, one for painting.
Here is a realistic time breakdown for a standard 12×12 bedroom with 8-foot ceilings:
| Task | DIY Time | Professional Time |
|---|---|---|
| Prep (move furniture, tape, spackle, clean) | 1–2 hours | 30–45 min |
| Priming (if needed) | 45 min + 1 hr dry | 30 min + 1 hr dry |
| Painting ceiling | 30–60 min | 20–30 min |
| Cutting in walls | 45–60 min per coat | 20–30 min per coat |
| Rolling walls | 45–60 min per coat | 20–30 min per coat |
| Drying between coats | 1–2 hours | 1–2 hours |
| Cleanup and tape removal | 30–45 min | 15–20 min |
| Total hands-on time | 6–10 hours | 3–5 hours |
Factors that increase painting time:
- Ceilings higher than 9 feet require more ladder repositioning
- Vaulted ceilings require special extension poles and slow, careful rolling
- Dark colors being painted over lighter ones (or vice versa) often need 3 coats
- Board and batten or wood wall treatment features require extensive cutting in
- Significant drywall repair adds 2–4 hours including dry time
Factors that decrease painting time:
- Using a paint sprayer on large, open spaces can cut wall coverage time in half
- Having a second person cut in while you roll
- Using good quality paint with high hide (like Benjamin Moore Aura) which covers in two coats instead of three
How Much Does It Cost to Paint a Room?
The average cost to paint a room is $300 to $800 for a standard bedroom when hiring a professional painter. For an average-sized living room, costs typically run $600 to $1,200. Bathrooms, despite being small, average $200 to $500 due to the need for mold-resistant paint and careful masking.
Cost by Room Type
| Room | Average Professional Cost |
|---|---|
| Small bedroom (100–150 sq ft) | $300–$600 |
| Standard bedroom (150–250 sq ft) | $500–$800 |
| Living room (250–400 sq ft) | $600–$1,200 |
| Kitchen | $400–$900 |
| Bathroom | $200–$500 |
| Full house interior | $3,000–$15,000 |
Professionals charge $2 to $6 per square foot, which includes both labor and materials. In high cost-of-living markets, rates in 2025–2026 are running $4.74 to $8.92 per square foot. Interior painting delivers a return on investment of approximately 107%, making it one of the highest-ROI home improvements available.
What Affects the Cost?
Paint quality: Standard latex paint costs $20–$40 per gallon. Premium brands like Benjamin Moore Aura or Regal Select run $60–$80 per gallon but cover better, last longer, and often eliminate the need for a third coat. Good quality paint is never where you should cut corners.
Number of coats: Most rooms require two coats. Painting over dark colors with a light color — or applying a dramatic dark color onto light walls — can require three coats, increasing both material and labor cost.
Trim and details: Adding trim painting (baseboards, crown molding, window frames) costs approximately $1 to $3 per linear foot for a professional, with ornate or hard-to-reach trim reaching $6 per linear foot.
Wall condition: Significant drywall repair, skim coating after wallpaper removal, or extensive sanding after plastering adds to prep time and cost.
DIY Paint and Supply Costs
For a standard 12×12 bedroom, you need approximately 1–2 gallons of paint for two coats of walls. At $60–$80 per gallon for premium Benjamin Moore paint, expect to spend $120–$200 on paint alone for a bedroom. Add primer, Frog Tape, a paint roller cover, a paint tray liner, canvas drop cloths, and spackle, and total DIY supply costs run $80–$150 for a first-time setup, less on future projects when tools are already owned.
How Much Does a Handyman Charge to Paint a Room?
A handyman typically charges $50 to $100 per hour for interior painting. For a standard bedroom, expect 4 to 8 hours of labor, putting the total at $200 to $800 not including paint and materials. A dedicated professional painting contractor charges a similar hourly rate but generally works faster and produces more consistent results on complex rooms.
The key differences:
- A handyman is a practical choice for small rooms, touch-ups, or simple single-color repaints with minimal prep.
- A professional painter is worth the investment for large spaces, complex trim work, high ceilings, specialty finishes, or when you want guaranteed clean lines.
Always ask whether the quoted price includes materials. Get the scope in writing before any work begins.
How Do You Paint a Room Like a Pro? (11 Tips)
The difference between a DIY paint job and a professional result comes down to preparation, patience, and a few techniques that most beginners skip.
- Use good quality paint. Benjamin Moore, Sherwin-Williams, Purdy, and Wooster products outperform cheap alternatives. Premium paint has more pigment and binder, which means better coverage and longer-lasting results.
- Use Frog Tape, not generic blue tape. Frog Tape’s PaintBlock technology seals the edge against bleed. It consistently delivers cleaner lines than standard painter’s tape, especially on textured walls.
- Cut in one wall at a time, then roll immediately. Rolling while cut-in edges are still wet blends the two areas invisibly. Dry cut-in edges create a visible painted “frame” around each wall.
- Always apply two thin coats. Two thin coats cure harder and look smoother than one thick coat. Thick coats drip, take longer to dry, and show brush texture.
- Use the W stroke when rolling. Roll a large W or M shape onto the wall first, then smooth with parallel vertical strokes. This distributes paint evenly and prevents heavy roller lines.
- Check temperature and humidity. Latex paint should be applied between 50°F and 85°F with humidity below 70%. High humidity increases dry time and can cause paint to sag or bubble — this temperature humidity check is critical in damp climates.
- Store wet brushes in Ziploc bags. Between coats, seal your paint brush in a Ziploc bag. It stays perfectly workable for hours without washing.
- Use paint tray liners. These $2 plastic inserts mean you never have to scrub a paint tray. Peel and discard after painting.
- Pull tape at 45 degrees while paint is wet. This edge feathering method creates a clean, sharp line without tearing the paint film.
- Use an extension pole on your roller. It lets you roll walls from floor to ceiling without stopping to reposition a ladder, producing more consistent pressure and a more even finish.
- Follow paint sprayer tips for large areas. For large open rooms or drywall, a paint sprayer can dramatically speed up coverage. Sprayer overspray prevention is critical indoors — mask everything meticulously before you begin.
FAQs
How many coats of paint does a room need?
Most rooms need two coats of paint for full, even coverage. Painting over a dramatically different color may require three coats. Always check the paint can for recommended dry time; for most latex paints, wait 1–2 hours between coats.
Should you paint the ceiling or walls first?
Always paint the ceiling first. Ceiling paint drips and spatters onto walls below, and it’s far easier to cover those drips when you paint the walls afterward. Painting walls first risks ruining a finished surface with ceiling splatter.
Can you paint a room in one day?
Yes, a standard 12×12 bedroom can realistically be completed in one day. Allow approximately 2 hours for prep, 1 hour for primer plus 1 hour dry, 2 hours for the first coat plus 1–2 hours dry, and 2 hours for the second coat. That is 9–10 hours total, which fits a long day.
What paint finish should you use for walls?
Use eggshell finish for most living areas and bedrooms — it is slightly washable and hides surface imperfections better than satin. Use satin or semi-gloss for bathrooms, kitchens, and all trim work. Use flat or matte for ceilings. The gloss level contrast between trim (semi-gloss) and walls (eggshell) is a classic interior design technique that adds depth.
How do you paint room corners cleanly?
Corner brush mastery comes with practice. Load a 2-inch angled brush, hold it at a 45-degree angle to the wall, and draw it slowly down the corner in one smooth continuous stroke. Keep your wrist locked and move from the shoulder.
How do you paint a room with high or vaulted ceilings?
Use a heavy-duty extension pole (up to 16 feet) on your paint roller and a quality ladder for cutting in. Work in sections and maintain a wet edge across the ceiling. A paint sprayer is a strong option for vaulted ceilings with careful masking and drop cloth anchoring.
Do you paint trim before or after walls?
Paint trim before walls. Apply painter’s tape to the wall side of the trim after the trim paint dries, then paint the walls and remove the tape while wet. This sequence gives the tightest, cleanest lines.
The Bottom Line
A fresh coat of paint is the most cost-effective way to transform a room in your home. With the right tools — Frog Tape, a high-quality paint brush, canvas drop cloths, Benjamin Moore interior paint — and the right technique — repair nail holes, prime your walls, cut in before rolling, apply two thin coats — you can achieve clean, professional results even on your first DIY project.
For a standard bedroom, budget $120–$200 for DIY supplies and paint, 4 to 8 hours of your time, and the satisfaction of watching a room completely change. For a professional finish, expect to pay $300 to $800 in most markets, with a return on investment that makes it one of the smartest home improvement decisions you can make.